Saturday 12 November 2011

Floating a Quilt – Tutorial

Kathy asked in the comments of my previous post if I float my quilts.  The answer is yes, and I thought I would share my method.

There are different ways of loading a quilt, and the best way depends on the preferences of the quilter.  I prefer to float my quilt as I feel it gives me more control, and I am better able to see any issues as I am working through the quilt.
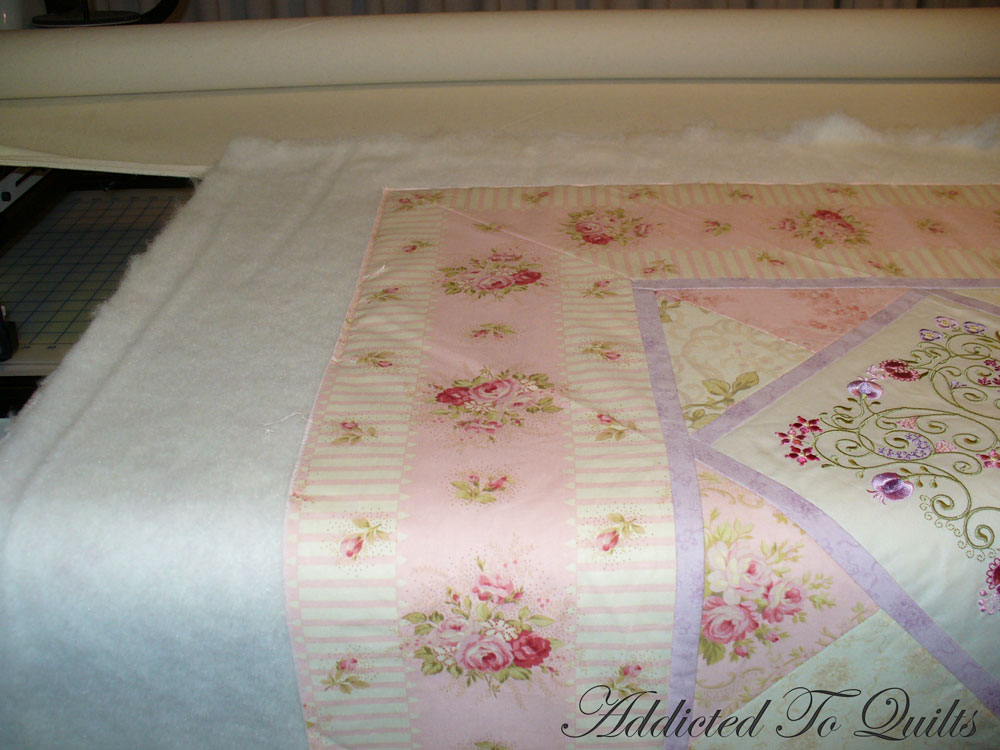
First I load the backing by pinning it to the rollers.  I lay the wadding on the top of it, and then the quilt top, ensuring that the top is straight and square on the machine. 


I then tack along the top edge of the quilt.


You can see in the picture that this quilt is extremely well pieced and is hanging straight on the machine.  However if there were issues like a wavy border, or fullness in places, I would be able to clearly see it and be able to take steps to correct them.

These photos show the quilt on my A1 machine.  Those with the same machine will see I have removed the top front roller.  I don’t use this roller and found it got in my way.  

I roll the quilt forward and tack down the sides.


After quilting or stabilising the available area, I roll the quilt forward, tacking down the sides as I go.  I check to ensure the sides are straight as I tack them down.  I also check that the lines in the piecing are straight and square.


I continue quilting, rolling the quilt forward and tacking down the sides until I get to the end of the quilt.  Then I tack down the bottom of the quilt.


If you want to see this quilt completed – click here.

The above photos are on my A1 machine and I follow the same procedure on my APQS.

I haven’t removed the top roller on my APQS as it doesn’t get in the way like on the A1.  I use it to line up the quilts to ensure they are square and it is handy to lean on. 


14 comments:

  1. Thanks Desley, it's reassuring to know I'm doing it right.

    ReplyDelete
  2. Thank you for the information. I've floated small quilts but I'm always a bit nervous about a large one. I think I will try it on my next personal quilt. It would save some time when loading that's for sure! It's always nice to have pictures to help explain things.

    ReplyDelete
  3. Thank you. I've also floated small quilts but not the large ones. But I may try your method, especially if it helps for fluttery borders.

    ReplyDelete
  4. I too own an A1 machine but my results are nothing like yours. I'm still struggling with tension issues but I do float my quilts as you suggest. May have to try removing that top bar. Thanks for the info.

    ReplyDelete
  5. Thats very interesting information Desley. I wish I could manage to do that. How long does it take for you to do that. I have lots of questions, but too many for here :)

    ReplyDelete
  6. It's always a pleasure to read and learn, you are so good at this ;)

    ReplyDelete
  7. I also float my quilts. Since I have the top bar on my APQS too, after I get my quilt all squared up and attached, I put a strip of blue painter's tape on my top bar right at the quilt edge (encircling the bar) and this gives me constant guides for keeping the quilt square as I work my way down.

    ReplyDelete
  8. Want to thank you for this tutorial. I have yet to load a quilt on my (new to me) HQ16, but will follow your photos and float the first quilting project. Sure does look like you will have more control of the top vs having it all rolled up.
    Thanks again!
    Deb in AZ

    ReplyDelete
  9. Knew I (Les) would find something on your blog. Thanks...this is the system I use and until the last two quilts, for some unknown reason, when I get to the bottom I have 'folds.' Very frustrating...but thanks for the assurance I'm loading, squaring, and progressing through the quilt systematically. Now to figure out where the excess is coming from. Les Page, Virginia Beach, VA. www.wequilttogether.blogspot.com 04/03/2013

    ReplyDelete
  10. Obrigada pela clareza das suas informações. Eu sempre tive dúvidas se deveria costurar a lateral toda ou se devia fazer isso à medida que avançava o quilting. Muita gente mostra como colocar uma colcha no frame, ou os movimentos e designs, mas esses detalhes poucas vezes são compartilhados. Muito obrigada.

    ReplyDelete
  11. Thanks for the clarity of its information. I always had doubts whether to sew the whole side or if I should do this as it advanced quilting. Many people shows how to put a quilt on the frame, or the movements and designs, but these details are seldom shared. Thank you.

    ReplyDelete
  12. After studying your photos, it appears to me that you 1) baste the available perimeter 2) stitch around the blocks to stabilize some of the interior 3) advance and repeat until you finish all sections 4) return to each section of the quilt and add quilting detail. Do I have an accurate understanding of your process?

    ReplyDelete
  13. After studying your photos, it appears to me that you 1) baste the available perimeter 2) stitch around the blocks to stabilize some of the interior 3) advance and repeat until you finish all sections 4) return to each section of the quilt and add quilting detail. Do I have an accurate understanding of your process?

    ReplyDelete