Monday, 25 July 2011

William Morris Appliqué


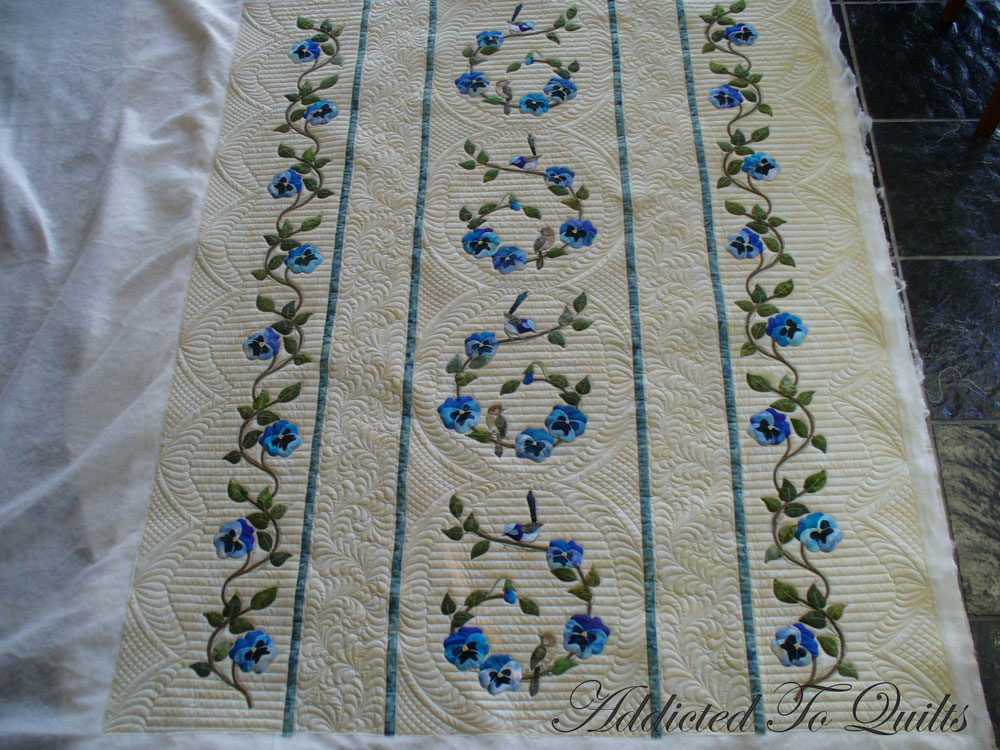
This beautiful appliqué quilt belongs to Margaret.  The pattern had appliqué on alternate blocks, but Margaret decided to piece plain blocks instead.  This left more scope for the quilting. 

We decided to quilt feathers around the appliqué ignoring the piecing which allows the feathers to flow across the quilt top.  I love the effect, and was very happy with how this quilt turned out.


Friday, 22 July 2011

Hungry Caterpillar

Do you remember the Hungry Caterpillar book from when you were a child?  It was one of my favourites.

This quilt belongs to Heather, and the pattern nicely showcases the Hungry Caterpillar fabric. 


I love the border.  It brings back memories of the book from when I was young, and imagining the delight of eating all those yummy foods.


Visit Sarah's Blog to see what other quilters have been working on this week.

Wednesday, 20 July 2011

Picture Appliqué

This stunning quilt belongs to Anthea.  She does gorgeous appliqué, which she pads for a beautiful 3D effect. 

This quilt was designed to depict the appliqué as though they were pictures on a wall. I quilted straight lines behind the appliqué ‘picture’, following the lines in the fabric to create the feeling of wallpaper.   


Visit Esther's Blog to see other quilter's work in porgress.

Friday, 15 July 2011

Allover Leaves

This is another one of Janet Sansom’s lovely embroidery quilts.  I normally custom quilt Janet’s quilts, but this time we decided to do an allover leaves and loop pattern.

As I quilt freehand, it was easy for me to quilt around the embroidery, and I also ditch stitched the stems of each embroidered flower.


 Visit Sarah's Blog to see what other quilters have been working on this week.

Wednesday, 13 July 2011

How I Quilted This - Tutorial

Mary asked me in what order I quilted the elements of Elaine’s appliqué quilt which I posted yesterday. (By the way, Mary’s blog is worth a peek  I especially like her latest post on the wholecloth she is making.  Click here to see it).

I thought answering that question would make a good blog post.

Whenever I’m doing a detailed custom job, I like to stabilise the quilt first. Then I can go backwards and forwards over the quilt doing the quilting as I please.

So firstly I outlined the appliqué, ditch stitched the four blue strips, and quilted the main or top curved cross hatching lines.

If you click on the picture you can see more clearly where I have marked the areas.


Originally Elaine wanted much simpler quilting, but as soon as I had these main curved cross hatching lines in, I could see a lot more potential, so I rang her and talked her into letting me do more feathers.

I then did the feathers on one of the curved cross hatching arches in the centre to see how I liked them. With a little unpicking, I was happy with how I got them to form the circle.


Once I was happy with one, I did the other side of that particular circle.


Elaine had asked for the horizontal lines to be 1 ½ inches apart. But when I quilted this, I could see that with the feathers this was now too wide, so I reduced it to ¾ inches apart. Once I was happy with the width of the horizontal lines I completed one of the centre circle shapes to make sure I was happy with the overall effect.


Because of the increased detail in the centre panel, I needed to do more detailed feathers in the plain cream strips than originally planned with my customer. I decided to do curling feathers in the cream strips, and now I then quilted in the stems.

You can see how I mark the stems at my blog post here.


Also, I now needed to do feathers on the borders, curving with the cross hatching to match the centre. Plus the horizontal lines also needed to be ¾ inch apart to match the centre.


At this point I had decided on all the quilting elements for the quilt – which you can see was an evolving process that involved some unpicking.

Now that the quilt was stabilised and all quilting decisions had been made, I rolled the quilt up and down, quilting it in whatever order I felt like. Because my hand aches when I do too much ruler work at the one time, I would alternate between quilting a few of the curved cross hatching areas with a few feathers.

To see more pictures of the quilt click here.

Tuesday, 12 July 2011

Curved Cross Hatching to create a Circular Effect

This exquisite quilt was made by Elaine.  Elaine does the most beautiful appliqué and embroidery, and it is always a pleasure to quilt for her.  To see Elaine’s butterfly quilt click here.

The quilting really evolved on this quilt while it was on the machine.  I always knew that I would do the curved cross hatching at the sides, but once the main lines were done, and the quilt stabilised, I then came up with the concept of how I wanted to do the feathers.

I love how the curved cross hatching has created a circular effect around the centre appliqué panel, and this was exactly the effect I was aiming for. 


Elaine chose a plain fabric on the back which is perfect for showing up the quilting beautifully.


Pop over to Esther's Blog to see what other people are working on with her WIP Wednesdays.

Friday, 8 July 2011

China Blue Quilt Finished

I finished quilting this a couple of weeks ago.  I made it as a thank-you gift.  The person I am giving it to doesn’t know it has been made, and I hope she will really like it.

As it will be a functional quilt, I didn’t want to quilt it too heavily, but wanted to do more than an allover to make the plain squares special. 

Once I have the binding completed, I will be mailing it to its new home.